While I had previously replaced my ignition switch, I was having issues with it and chose to replace it again.
When I got the truck the PO had some kind of universal ignition switch installed and the key did not match the door locks. It was missing the proper bezel, did not have a normal wiring pigtail. I initially replaced it by purchasing (a) A Dennis Carpenter ignition switch housing (b) Spacer (c) Bezel (d) Wiring pigtail and (e) Matching ignition cylinder and door cylinders.
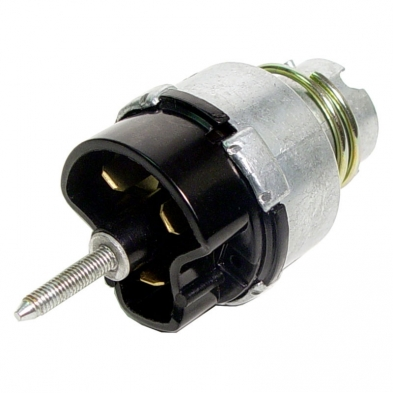
This worked fine for some time. However, within around 8 months I found that the key did not spring back from the start to the run position, leaving the starter engaged and requiring me to manually turn the key back to run. I also found that locating each of the off/run/start locations was too loose, meaning I’d accidentally find start when looking for run, or accidentally turning it off when trying to manually move from start back to run.
This is the one I had trouble with:
I decided to purchase a new ignition switch from another source, retaining the spacer, bezel, cylinder and pigtail.
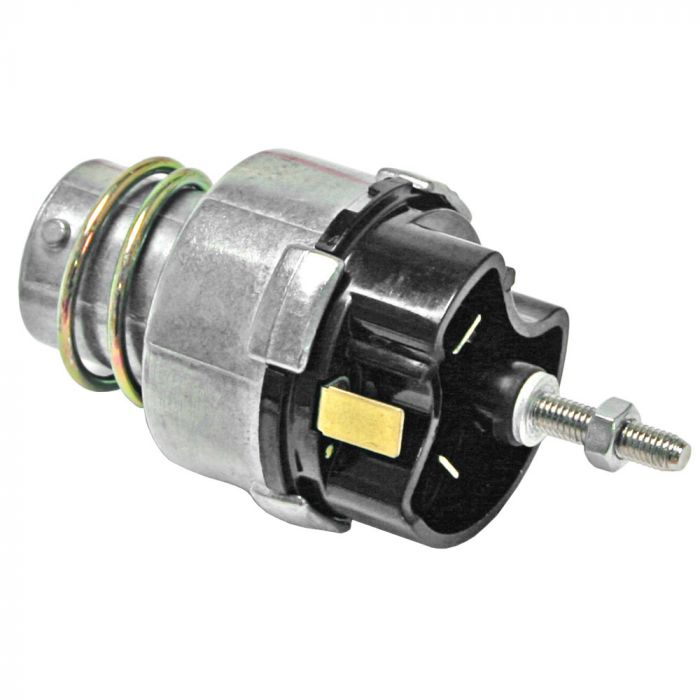
This is the new switch I bought from CJ Pony Parts:
https://www.cjponyparts.com/cj-classics-ignition-switch-assembly-mustang-1965-1966/p/ISA13/
The brand is Suntex:
Bonus – This one came with the correct nut for the accessory post (the Dennis Carpenter one did not), saves you messing around looking for a metric nut. It looks very similar to the Dennis Carpenter housing, except the metal is shiny.
Removing existing lock housing
- From the back accessory post, remove the nut and take of any accessory wiring.
- From the back, pull off the wiring pigtail
- Turn the key to accessory position
- Insert a pin in the small hole (I used the pin that came with my iPhone) and simultaneously turn the key further left beyond accessory.
- The lock cylinder should pop out
- Push the lock housing from the back towards the dashboard to compress the spring and turn the housing (or turn the bezel in opposite direction) to release the bezel from the housing
Take a look at the housing you just removed and eyeball where the top of the housing is (on mine there is a little notch) so that you can get the new one in the right position first time.
Installing the new lock housing
I found it easier to install the wiring pigtail first. In fact, it wouldn’t go on easily, I had to use my finger to move some of the prongs around in the lock housing to get them to line up properly with the slots in the pigtail.
Pretty much the reverse:
- Place the spacer onto the new housing
- From the back seat the spacer tabs into the cutouts
- Ensure the new housing is oriented correctly (remember where the top should be)
- Install the bezel. I found it easiest to keep the bezel in a fixed position and rotate the housing:
- Hold the bezel in the correct orientation (i.e. “off” at the top)
- From the back push the housing against the dashboard to compress the spring and turn the housing while holding the bezel until the tabs on the housing line up with the Bezel slots
- While pushing super hard from the back and holding the bezel, turn the housing the opposite direction to seat the tabs on the housing in the correct place in the Bezel
- Install the lock cylinder. The key has to be in the same position as when you removed it (past accessory) so you may need to reset that. Insert the cylinder in from the front, gently moving it around until it seats correctly. Then turn the key back through accessory to off and remove
Then re-attach your accessory wiring and screw on the nut.
Conclusion
This new lock housing has a firm action when turning between off and accessory. It also springs back nicely from start to run. We’ll see if it lasts…